
Roof moss removal, step by step
Most people have never watched a roof being cleaned properly, so it is hard to judge whether the job you are paying for is being done well. This guide walks through a full moss removal from the moment the van arrives to the moment the last bag is loaded.
Nothing here is secret. Knowing the order of work and why each stage exists is the easiest way to tell a careful contractor from someone in a hurry.
Need this sorted?
Need roof moss removal? Get a quote from Sky Scrapers.
Stage one: the walk round
Before anything is set up, the roof and the ground below it are looked at together. We check the covering type and its condition, the state of the ridge and verge mortar, whether tiles have slipped, where the valleys run, and how much moss is sitting in the gutters already.
Underneath matters just as much. Conservatories, glazed porches, greenhouses, planting, ponds, garden furniture and parked cars all determine where debris can safely fall and where sheeting has to go first.
Stage two: access and protection
- Ladders are footed and tied, and roof ladders are used to spread load rather than walking directly on old tiles.
- Sheeting goes over planting, paths, glazing and any lean-to below the working area.
- Gutter outlets and downpipe tops are protected or monitored so the falling material does not simply relocate into the drainage.
- A drop zone is agreed and kept clear of people and pets for the whole visit.
Stage three: the hand clean
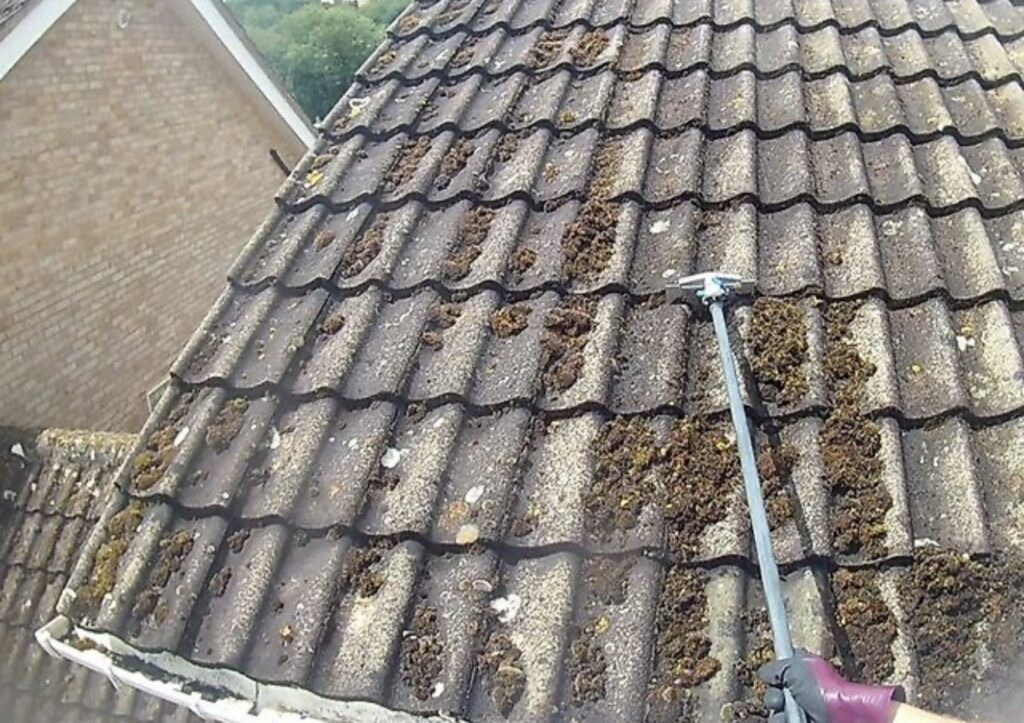
Moss is removed by hand, working from the ridge downwards so that cleaned areas are not re-soiled. Scrapers and brushes are chosen for the covering: a concrete interlocking tile tolerates a firmer tool than a weathered clay plain tile or a natural slate.
The work goes course by course. On a heavily colonised roof this is slow, and it should be. Moss that has been in place for years grips the tile surface and will lift the weathered face with it if it is torn off quickly. Rushing here is what causes the cracked tiles and open laps we get called out to repair after somebody else's visit.
Valleys, hips, abutments and the areas around chimney stacks are worked separately because that is where debris packs hardest and where water damage starts if it is left.
Stage four: gutters and drainage
There is no point cleaning a roof and leaving the material in the gutters. Once the slopes are clear, gutters are emptied by hand, brackets and joints are checked, and outlets and downpipes are flushed and confirmed as running.
This is also when sagging runs, loose brackets and split joints show up. We photograph anything of that sort and tell you rather than covering it over.
Stage five: treatment
With the bulk material gone, a biocide treatment is applied to kill the spores and root residue left behind in the tile surface. This is the stage that decides how long the result lasts. Skipping it means the green film returns quickly, because scraping never removes what is embedded in the pores of the tile.
The treatment is not a paint or a sealant and it does not change the appearance immediately. It works over the weeks that follow, and weather does the final rinsing. Full roof cleans carry our written 24-month biocide guarantee.
Stage six: clear-down and handover
Sheeting comes up carefully so the collected material goes into bags rather than back into your borders. Paths, patios and the drive are swept or rinsed, and everything that came down is loaded and taken away.
Before we leave, we walk you round it. You get told what we found, shown any defects we photographed, and given a straight view on whether anything needs attention now or can be watched for a season.
Our own photographs
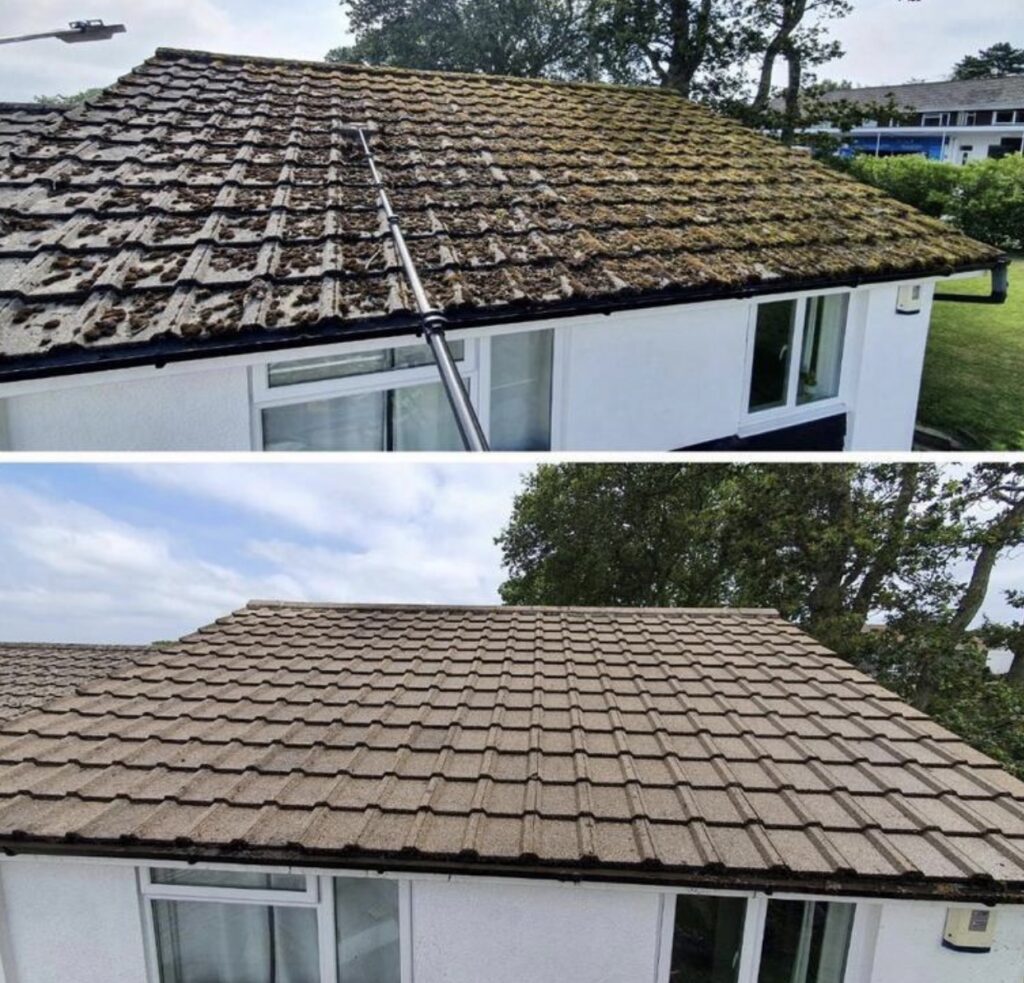
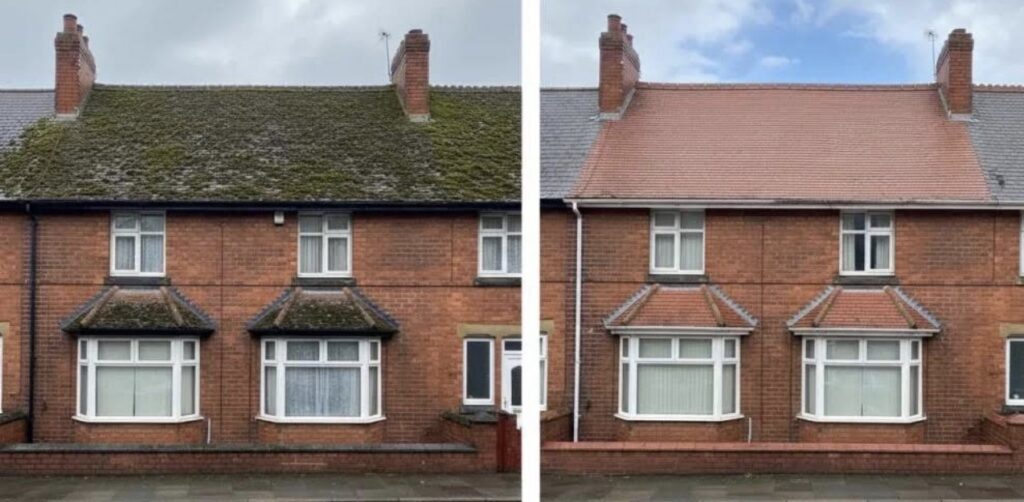
Images from Sky Scrapers Ltd work showing the methods described on this page.
Where this applies locally
Towns where this comes up most often on our patch:
- Roof Moss Removal in AmpthillBedfordshire · MK45
- Roof Moss Removal in BedfordBedfordshire · MK40
- Roof Moss Removal in FlitwickBedfordshire · MK45
- Roof Moss Removal in LutonBedfordshire · LU1
- Roof scrapingMethod
- What changes the price of roof moss removalCost guide
- What to expect on the day your roof is cleanedGuide
- Why pressure washing damages roof tilesGuide
Want a professional to handle it?
Book a moss removal with a team that works slowly
Free quotes, ground protection as standard and every bag of moss taken away.
Sky Scrapers Ltd · info@sky-scrapers.co.uk
Questions we get asked
How long does a full moss removal take?
Most domestic roofs are a single day. Heavily colonised or complex roofs with several valleys and dormers can run into a second day, and we will tell you which yours is before booking.
Will the tiles be damaged by scraping?
Not when the tool is matched to the covering and the work is done slowly. Damage comes from rushing and from pressure washing, which is why we do neither.
Do you have to walk on my roof?
Where access requires it we use roof ladders to spread the load rather than treading directly on tiles. On many roofs the work can be done from ladders and our own access equipment.
Why is there still colour on the tiles afterwards?
Hand cleaning removes growth, not decades of natural weathering. The biocide then clears the remaining film gradually over the following weeks.
What happens to all the moss?
It is collected off the sheeting, bagged and taken away as part of the job. Nothing is left in your garden.
In short
A proper moss removal runs in order: survey, protect, hand clean from the ridge down, clear the gutters, treat the surface, then clear down and hand over. Anything that skips the protection, the gutters or the treatment is not the same job.
Related services
Covering Bedfordshire and surrounding counties